DIY Financial Management: How I Set Up Firefly III on a VPS
Discover how I took control of my personal finances by self-hosting Firefly III on Digital Ocean's Droplet Virtual Private Server (VPS), ensuring complete privacy and flexibility
Stateless 🤯
8/25/2024

This all started with me wanting to learn a little more about open-source projects, thinking it could help me grow as a developer.
I began by searching for open-source projects that I might find useful and that I could get familiar with. My hope was that, over time, I might contribute to something if I understood it well enough. That’s when I stumbled upon Firefly 3, a personal financial manager that seemed like the perfect fit for what I was looking for. The only catch? You have to host it yourself. But that’s actually a plus because it means you have complete control and privacy over your data. If privacy is your top priority, you can even run it locally on your machine. But since I’ve been curious about exploring VPS (Virtual Private Servers), I decided to set it up in the cloud.
There are plenty of VPS providers to choose from—AWS, GCP, Linode, Vultr, and more. Personally, DigitalOcean's Droplet caught my eye. I really liked the clean UI and the overall user experience they offer. Plus, it's relatively affordable compared to some other options. I went with their $6/month plan, which gives you 1GB of RAM, 1 CPU, and 25GB of SSD storage—plenty for what I needed.
I’m not going to go into detail on how to acquire a VPS server; it’s pretty straightforward, and you can follow the guide here.
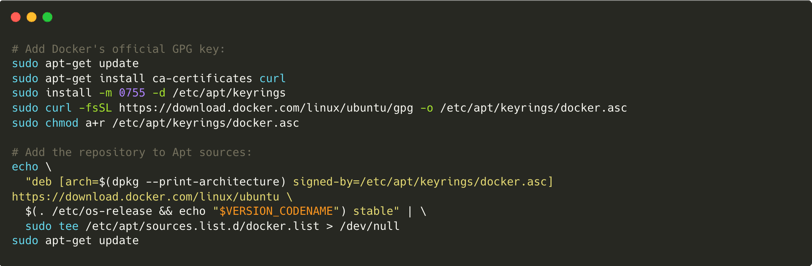
I chose Ubuntu as my operating system, and once everything was set up, the first thing I did was install Docker. I followed the instructions from Docker’s official documentation here and decided to use apt for the installation.
Here’s how I set up Docker’s apt repository:

Next, I installed Docker’s packages:
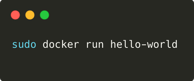
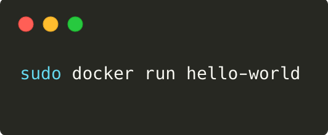
To make sure everything was installed correctly, I ran a quick test using Docker’s hello-world container:
With Docker up and running, I was ready to install and host Firefly III. If you’re interested, you can check out Firefly III’s Docker page here.
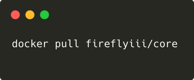
I started by pulling the Firefly III image:
Next, you’ll need to define the services for your application in a docker-compose.yml file. Make sure to copy the raw file carefully because even small spacing errors can mess up the installation process.
After that, you’ll need to download the configuration files for the app and the database
Don’t forget to set DB_PASSWORD and MYSQL_PASSWORD to the same value.
I saved all these files in the ~/fireflyiii directory.
After completing these steps, if you type ls -al ~/fireflyiii, you should see these files:
.db.env
.env
docker-compose.yml
Finally, to get everything up and running, just execute:
sudo docker-compose up -d
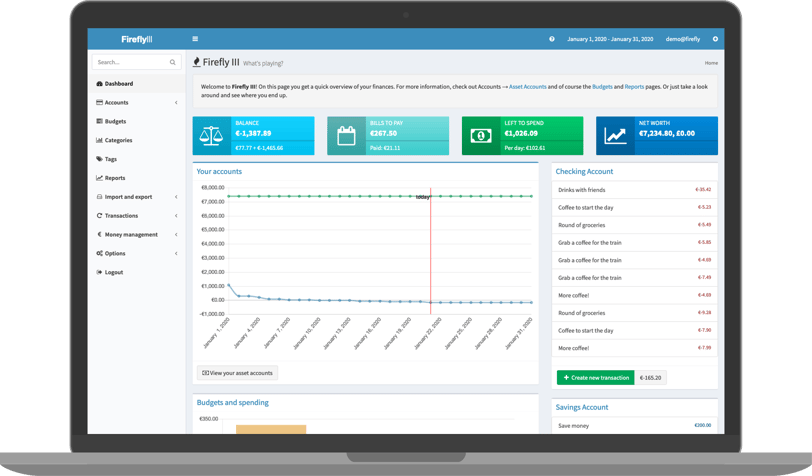
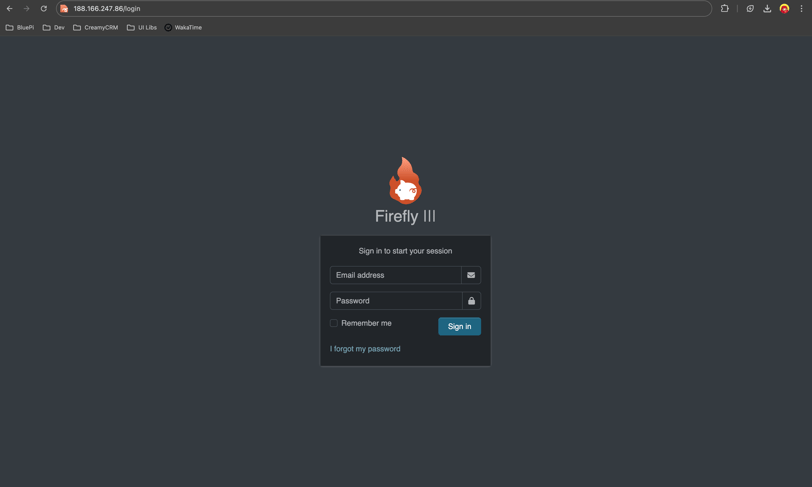
This will bring up all the necessary containers, and you should be able to access Firefly III’s sign-up interface and start managing your personal finances with full control and privacy!

Since I didn’t want to access the app using my VPS IP address, I decided to link the service to a domain name I recently purchased.
I also wanted to use this VPS for hosting other services, so I needed a reverse proxy. To achieve this, I installed nginx:
Optional Steps: Setting Up a Domain Name


Make sure that in the .env file, you should set the value for TRUSTED_PROXIES=**
You’ll also need to set up an SSL certificate:

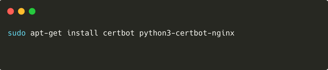
Then, use Certbot to generate the SSL certificate:


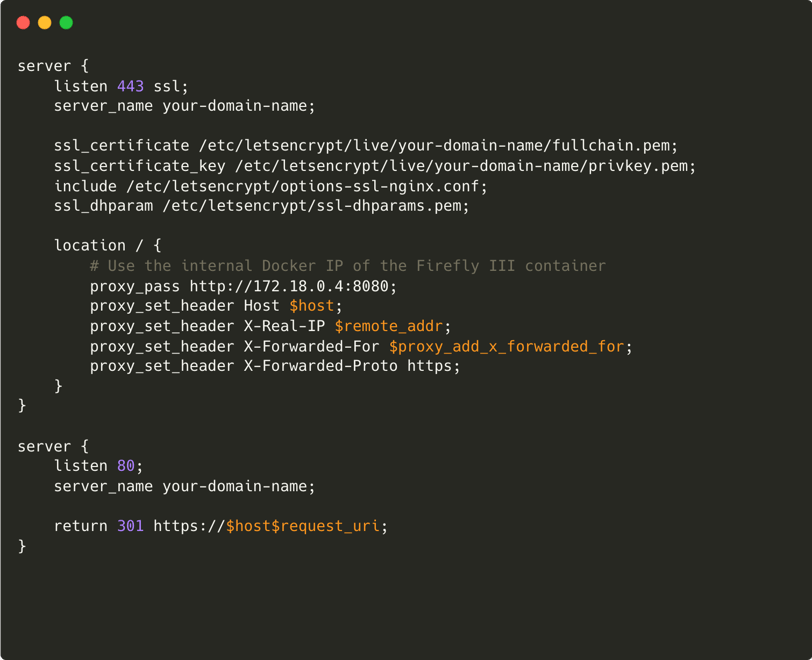
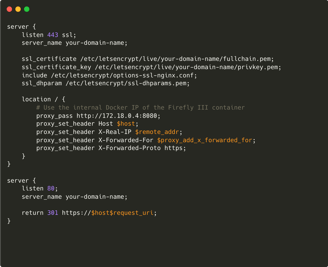
Next, create an Nginx configuration file:


Here’s what your configuration should look like:


Finally, enable the Nginx configuration:
Now, you should be able to access Firefly III using your domain name. Enjoy managing your finances with all the privacy and control you could want!